Die Installation eines Bereitstellungspakets ist mit Fehlercode 0x80070057 oder 0x800710d2 fehlgeschlagen
Aktualisiert Januar 2024: Erhalten Sie keine Fehlermeldungen mehr und verlangsamen Sie Ihr System mit unserem Optimierungstool. Holen Sie es sich jetzt unter - > diesem Link
- Downloaden und installieren Sie das Reparaturtool hier.
- Lassen Sie Ihren Computer scannen.
- Das Tool wird dann deinen Computer reparieren.
Schnelle Navigation
Wenn Sie den Scan-Statusbefehl verwenden, um ein Bereitstellungspaket in Ihrem System zu erstellen, besteht die Möglichkeit, dass der Fehler "Bereitstellung fehlgeschlagen" auftritt.Der Fehler wird normalerweise von zwei verschiedenen Fehlercodes 0x800710d2 oder 0x80070057 begleitet.Der vollständige Fehler ist wie unten gezeigt
Installation of a provisioning package failed. Please work with the package author to diagnose the problem
Reported error code: 0x80070057.
OR
Installation of a provisioning package failed. Please work with the package author to diagnose the problem
Reported error code: 0x800710d2.
Although the error codes are different, the fixes for the issue are the same.
Fix 1: Run Error Checking on local disk
Step 1: Open the Windows Explorer pressing the keys Windows and Eat the same time.
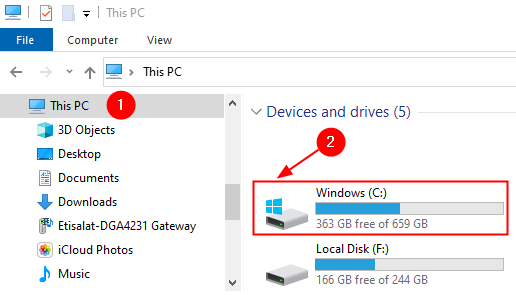
Step 2: From the left side menu, choose This PC
Step 3: Under the Devices and drivessection, right-click on the drive that has Windows OS installed on it. A Windows symbol will be present on the drive refer to the below screenshot for more detail
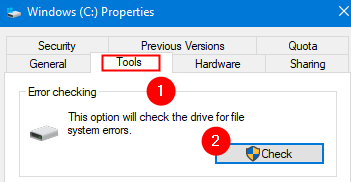
Step 4: Right-click on that drive and choose Properties

Step 5: Go to the Tools tab
Step 6: Click on the Check button
Step 7: In the Error Checking window that pops up, click on the Scan driveoption
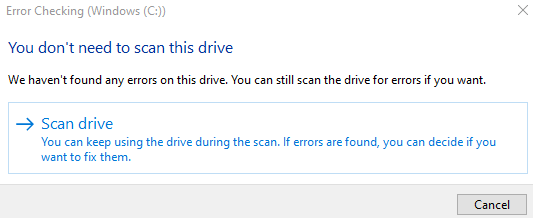
Step 8: Once the scan finishes, try and check if the error fixed the issue.
Fix 2: Running an SFC Scan
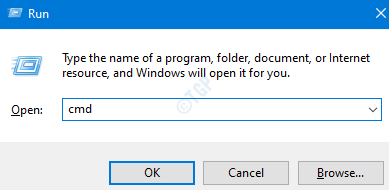
Step 1: Open Run Dialog holding Windows logo key and Rtogether.
Step 2: Enter cmd and press the keys Ctrl+Shift+Enterto open the Command Prompt with Admin Rights
Step 3: In the User Access control window that shows up asking for permissions, click onYes.
Step 4: In the command prompt window that opens, just type the below command and hit Enter
sfc /scannow
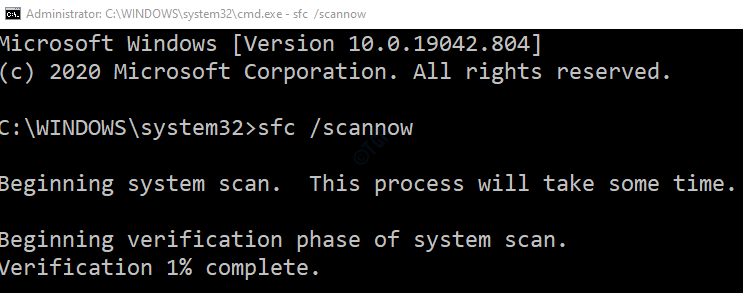
Please note that the scan takes some time to finish. Kindly wait till the scan finishes.
Step 5: After the scan completes, the corrupted files will be repaired.
Step 6: Restart the system
That" all>
Wir hoffen, dass dies informativ war.Bitte kommentieren Sie und teilen Sie uns mit, ob Sie das Problem beheben konnten.Teilen Sie uns bitte auch den Fix mit, der in Ihrem Fall geholfen hat.